Arduino スケッチ例「Debounce」を試してみましょう。
TUTORIALS > Built-In Examples > 02.Digital > Debounce
Debounce
Pushbuttons often generate spurious open/close transitions when pressed, due to mechanical and physical issues: these transitions may be read as multiple presses in a very short time fooling the program. This example demonstrates how to debounce an input, which means checking twice in a short period of time to make sure the pushbutton is definitely pressed. Without debouncing, pressing the button once may cause unpredictable results. This sketch uses the
millis()function to keep track of the time passed since the button was pressed.
2番ピンに接続されたスイッチを押すたびに 内蔵 LED が点灯と消灯に切り替わるというものですが、この場合に問題となるスイッチのチャタリングを防止するためのスケッチ例です。
スケッチをパッと見てもどうなっているのかよくわかりませんでしたので、フローチャートを書いてみました。
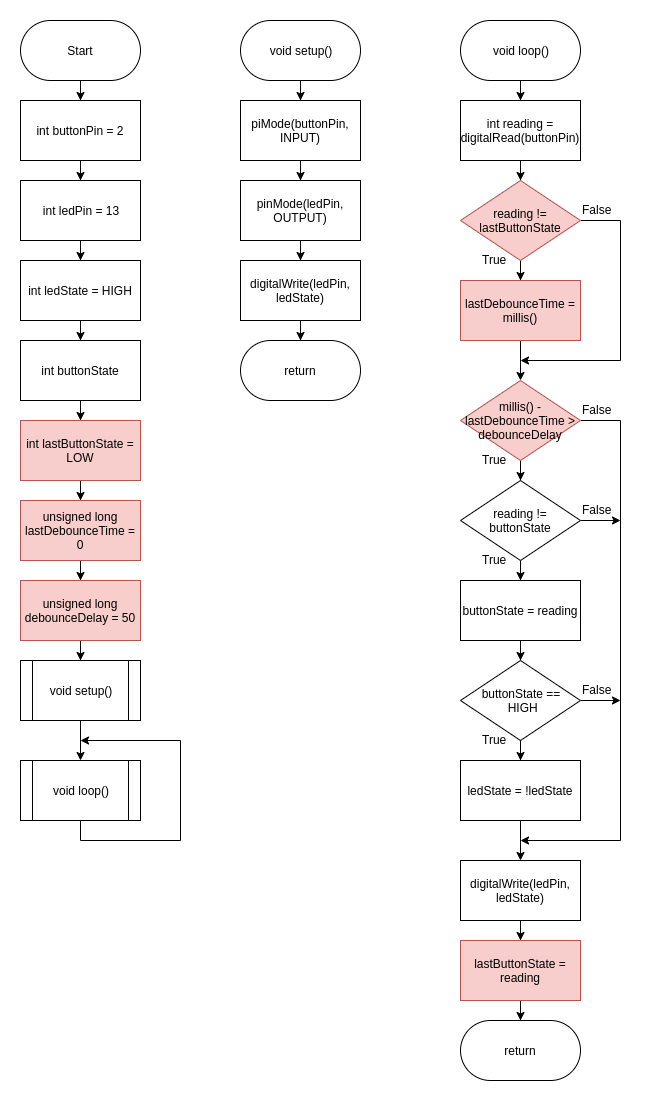
赤い部分がデバウンスを行なっています。
ボタンの状態が変化したことを検出したら lastDebounceTime をリセットし、debounceDelay (50ms) の間は LED 出力を変化させません。ボタンの状態が変化なく 50ms 経過したら LED の制御処理を実行しますが、変化があったときは再び lastDebounceTime をリセットし、変化がなくなるのを待っています。
こうしてデバウンス部分を分けてみると、とても単純な処理をしていることがわかりますね。
ちなみに、このスケッチ例では ledState を反転させるために「!」でブーリアン値の否定を利用しています。俺の好きな XOR によるビット操作 ledState ^= 1 よりわかりやすいです (^_^;)